> ## Documentation Index
> Fetch the complete documentation index at: https://utilified-mintlify-8f4debb2.mintlify.site/llms.txt
> Use this file to discover all available pages before exploring further.
# Creating Accounts
> Step-by-step guide to creating a new account in UMS — enter company details and legal information, then add sites, connections, contacts, and agreements.
This guide walks you through creating a new account in UMS.
Navigate to the **Accounts** page from the sidebar and click the **+** button in the top-right corner.
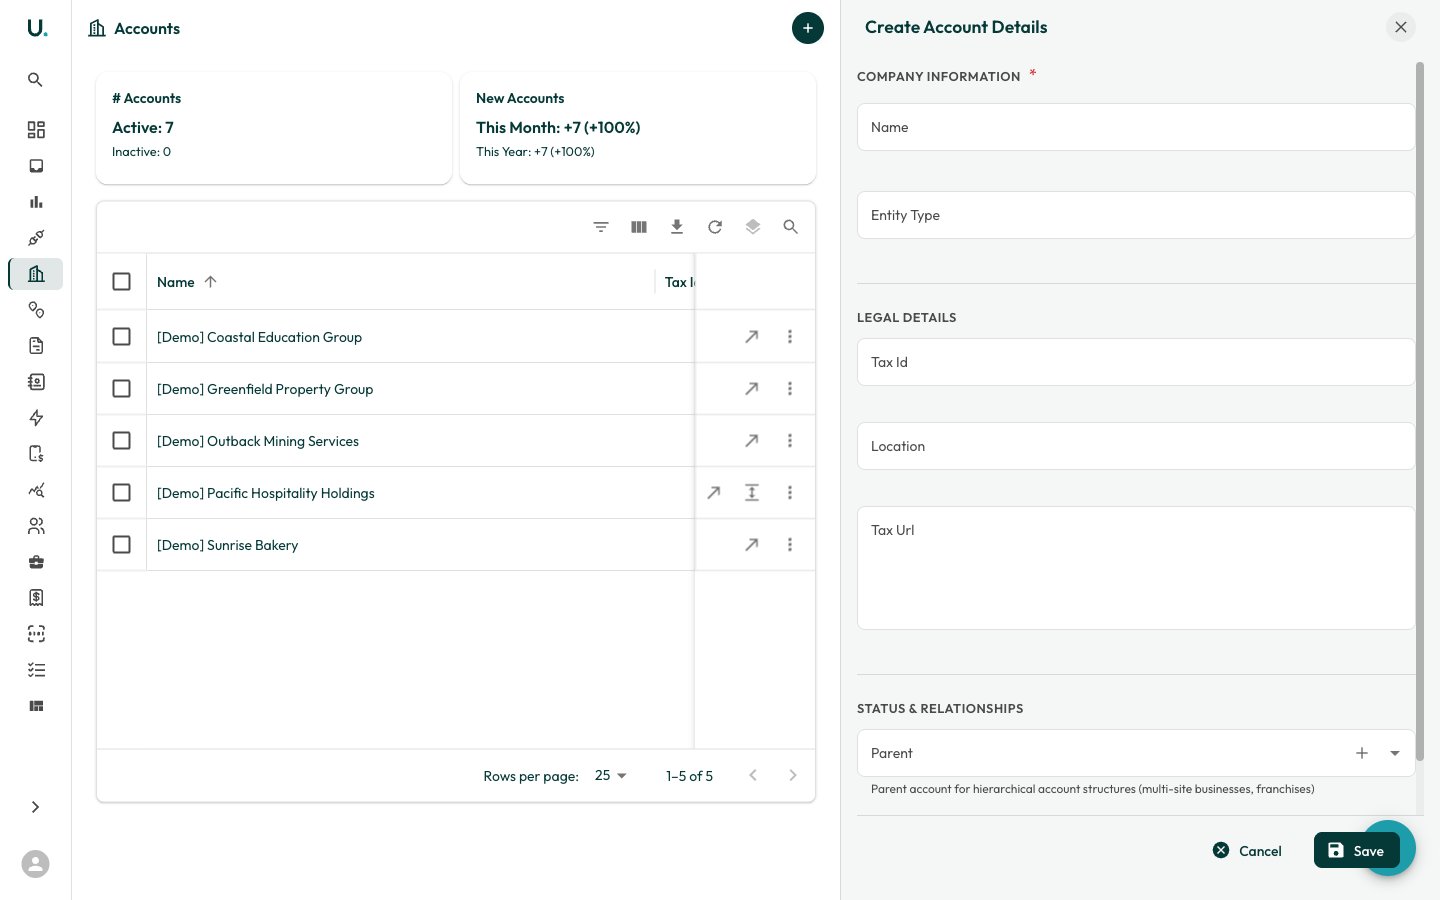 The create drawer opens with the following sections:
### Company information (required)
* **Name** — Enter the business name. This field supports autocomplete to help you avoid duplicates.
* **Entity Type** — Select the legal entity type (for example, Australian Private Company, Strata-title, Other Partnership).
### Legal details
* **Tax Id** — Enter the ABN or ACN (format: 11 111 111 111).
* **Location** — Country code (for example, AU).
* **Tax Url** — Link to the ABR entry for verification.
### Status and relationships
* **Parent** — Optionally link this account to a parent account for hierarchical structures (for example, franchises or multi-site businesses). Use the **Quick Add** button to create a parent account on the fly.
Click **Save** to create the account. You are taken to the new account's detail page, where you can add sites, connections, and agreements.
## After creating an account
Once created, you should:
Navigate to the Sites tab and add physical locations.
Link electricity, gas, or water meter connections to each site.
Set up energy agreements with suppliers. See [Managing Agreements](/guides/managing-agreements) for details.
Associate retailer account references for invoice matching.
The create drawer opens with the following sections:
### Company information (required)
* **Name** — Enter the business name. This field supports autocomplete to help you avoid duplicates.
* **Entity Type** — Select the legal entity type (for example, Australian Private Company, Strata-title, Other Partnership).
### Legal details
* **Tax Id** — Enter the ABN or ACN (format: 11 111 111 111).
* **Location** — Country code (for example, AU).
* **Tax Url** — Link to the ABR entry for verification.
### Status and relationships
* **Parent** — Optionally link this account to a parent account for hierarchical structures (for example, franchises or multi-site businesses). Use the **Quick Add** button to create a parent account on the fly.
Click **Save** to create the account. You are taken to the new account's detail page, where you can add sites, connections, and agreements.
## After creating an account
Once created, you should:
Navigate to the Sites tab and add physical locations.
Link electricity, gas, or water meter connections to each site.
Set up energy agreements with suppliers. See [Managing Agreements](/guides/managing-agreements) for details.
Associate retailer account references for invoice matching.